Creating the 3 Year Frontend Strategy

Last post we talked about Developing the 3 Year Frontend Vision, in this post we will go into how that vision, the tenets, requirements, and challenges shaped the Strategy moving forward.

One of the key themes in Eventbrite since I joined is DevOps, moving ownership from a single team who has been responsible for ops and distributing that responsibility to each individual team. To give them ownership over decisions, infrastructure, and to control their own destiny. The first step in defining the Strategy was to put together what a Technical Strategy is, and the foundation for that strategy.

Technical Strategy

The overall Technical Strategy is based on availability and ownership. Starting with the way we build our services and frontends, to the way we deploy and serve assets to our customers. The architecture is designed to reduce the blast radius of errors, increase our uptime, and give each team as much control over their space as possible.

Availability

Moving forward we will achieve High Availability (HA), in which our frontends and systems are resilient to faults and traffic, and will operate continuously without human intervention. In order to achieve HA, we will utilize Managed AWS Services or redundant fault tolerant software, and by utilizing content delivery networks (CDN) to increase our performance and resilience by putting our code as close to the customer as possible. We will ensure that all aspects of the system are tested, fault tolerant, and resilient, and that both the client-side and server-side gracefully degrade when downstream services fail.

Ownership

DevOps combines the traditional software development by one team and operations and infrastructure by another into a single team responsible for the full lifecycle of development and infrastructure management. This combination enables organizations to deliver applications at a higher velocity, evolving and improving their products at a faster pace than traditional split teams. The goal of DevOps is to shift the ownership of decision making from the management structure to the developers, improve processes, and remove unproductive barriers that have been put in place over the years.

Frontend

Once we had the foundation of the strategy defined, it was time to define the scope. To understand how to develop a strategy, or to even define one, we need to understand what makes up a “frontend”. In our case, the Frontend is everything from the backend service api calls to the customer. Because of this, we need to design a solution that allows for code to be run in a browser, on a server, service calls from a browser. Once you define the surface area of the solution, it becomes apparent that the scope and complexity of this problem is quickly compounding.

High Level Architecture

We need to define an architecture for everything above the red line in the above graphic. In order to simplify the design, I broke this down into three main areas; The UI Layer consisting of a micro-frontend framework with team built 

Custom Components, a shared Content Delivery Network (CDN) to front all customer facing pages, and a deployable set of bundled software that we code named Oberon, including a UI Rendering Service and a Backend-For-Frontend.

UI Layer

The UI leverages the micro-frontend architecture and modern web framework best practices to build frontends that leverage browser specifications while being resilient and team owned.

Micro-Frontend

When first approaching the micro-frontend architecture I realized that there is no clear definition of what a micro-frontend is.

Martin Fowler has a very high level definition which he states as

“An architectural style where independently deliverable frontend applications are composed into a greater whole”.

Xenon Stack describes a Micro-frontend as

“a Microservice Testing approach to front-end web development.”

Reading through the many opinions and definitions, I felt it was necessary to get a clearer understanding, and for everyone to agree what a micro-frontend architecture is. I worked with a couple of other Frontend Engineers to put together the following definition for a Micro-Frontend.

Definition

A Micro-Frontend is an Architecture for building reusable and shareable frontends. They are independently deployable, composable frontends made up of components which can stand on their own or be combined with other components to form a cohesive user experience. This architecture is generally supported by hosting a parent application which dynamically slots in child components. Components within a micro-frontend should not explicitly communicate with external entities, but instead publish and subscribe to state updates to maintain loose coupling. 

Micro-frontends are inspired by the move to microservices on the backend, bringing the same level of ownership and team independent development and delivery to the frontend.

Self-Contained Components

In order to avoid frontends that over time inadvertently tightly couple themselves and create fragile un-reusable components, we must build components that are encapsulated, isolated, and able to render without the requirement of any other component on the page. 

Component Rendering Pipeline

The Component Rendering pipeline renders components to the customer while the framework defines a set of Interfaces, Application Context, and a predictable state container for use across all of the rendering components.

State Management

State management is responsible for maintaining the application state, inter-component communication and API calls. State updates are unidirectional; updates trigger state changes which in turn invoke the appropriate components so they can act on the changes. 

Content Delivery Network

Our current architecture has resilience issues, where one portion of the site may become slow or unresponsive and that has a direct impact on the rest of the domain, and in many cases cause an overall site availability issue. In order to get around some of this issue, we add a CDN at the ingress of our call stack. Every downstream frontend rendering will contain Cache-Control headers, in order to control the caching of assets and pages in the CDN. During a site availability issue, the rendering fleet may increase the cache control header, caching for small amounts of time (60 seconds – 5 minutes max), for pages that don’t require dynamic rendering, or customer content. Thus taking load off the fleet and increasing it’s resource availability for other areas.

Oberon

Oberon is a collection of software and Infrastructure-as-Code (IaC) that enables teams to set up frontends quickly and to get in front of customers faster. It includes a configurable Gateway pre-configured for authentication as needed, a UI Rendering Service to server-side render UI’s, UI Asset Server to serve client side assets, and a stubbed out Backend-For-Frontend. 

Server Side UI Rendering Service

The UI Rendering Service defines a runtime environment for rendering applications, their components, and is responsible for serving pages to customers. The service maps incoming requests to applications and pages, gathers dependency bundles, and renders the layout to the customer. Oberon will leverage the traffic absorbing nature of a CDN with the scaling of a full serverless architecture. 

Backend-For-Frontends (BFF)

A BFF is part of the application layer, bridging the user experience and adding an abstraction layer over the backend microservices. This abstraction layer fills a gap that is inherent in the microservice architecture, where microservices must compete to be as generic as possible while the frontends need to be customer driven.  

BFFs are optimized for each specific user interface, resulting in a smaller, less complex, and faster than generic backend, allowing the frontend code to 1) limit over-requesting on the client, 2) to be simpler, and 3) see a unified version of the backend data. Each interface team will have a BFF, allowing them autonomy to control their own interface calls, giving them the ability to choose their own languages and deploy as early or as often as they would like.

Next Steps.

Now that we’ve published the 3 Year Frontend Strategy, the hard work begins. Over the next few months we will be defining the low level architecture of Oberon, and working on a Proof Of Concept that teams can start to leverage in early 2022.

Creating a 3 Year Frontend Vision

JC Fant IV
Oct-5th-2021

History

Over the course of the last 21 years I’ve spent time in nearly every aspect of the technical stack, however, I’ve always been drawn to the frontend as the best place to be able to impact customers. I’ve enjoyed the rapid iterations, and the ability to visualize those changes in the browser. It’s why I  spent much of the last 14 years prior to Eventbrite at Amazon (AWS) evangelizing the frontend stack. That passion led me to co-found one of the largest conferences internally to Amazon reaching over 7500 engineers across 6 continents. The conference is focused on all aspects of the Frontend, and helped to highlight technologies that teams could adopt and leverage to solve customer problems.

In March of 2021 I joined Eventbrite to help solve some of those same challenges that I’ve spent much of my career trying to solve. As part of my onboarding I was asked to ramp up on the current problem space and the technical challenges the company faces, and to dive into the issues impacting many of our frontend developers and designers. With all of that knowledge, I was tasked to come up with a 3 Year Frontend Strategy. 

Many of you have already read the first 3 posts in this series, Creating our 3 year technical vision, Writing our 3 year technical vision, and Writing our Golden Path. If you haven’t had a chance, those 3 posts help to set the context for how we defined and delivered our 3 year Frontend Strategy.

Current Challenges and Limitations

In those previous posts, Vivek Sagi and Daniel Micol described many of the problems that backend engineers, and engineers in general face at Eventbrite. My first task was to engage and listen to the Frontend Engineers around the company and to identify more specific frontend challenges and limitations that we face every day.

  • A monolithic architecture leads to teams having unnecessary dependencies and being forced to move at the speed of the monolith. They are often blocked by other changes or the release schedule of the monolith.
  • Our performance is suboptimal leading to some poor customer interfaces and low lighthouse scores. 
  • We lack automation in how we test, deploy, monitor and roll back our frontend code.
  • Our frontends are currently written in both a legacy framework and a more modern framework where the rendering patterns have diverged, and are no longer swappable without a migration. 
  • Service or datastore performance issues have a high blast radius where  all aspects of the site are degraded including pages that are static in nature.
  • Our front end experiences are inconsistent across our product portfolio and making changes to deliver against our 3-year self service strategy requires too much coordination.

Developing Requirements

Now that we had a decent understanding of the issues we’ve been facing, we turned our attention to understanding the requirements to solve these problems. 

  1. Features. As our product offering evolves to deliver high quality self-service experiences for creators and attendees, we ensure that our technology stack enables teams to efficiently create, optimize, and maintain the net new functionality we provide. 
  2. Performance. User perception of our product’s performance is paramount: a slow product is a poor product that impacts our customers’ trust. 
  3. Search Engine Optimized. Through page speed, optimized content, and an improved User Experience, our frontends must employ the proper techniques to maintain or increase our SEO.
  4. Scale. Our frontends must out-scale our traffic, absorbing load spikes when necessary, and deliver a consistent customer experience.  
  5. Resilient. Our frontends will respond to customer requests, regardless of the status of downstream services. 
  6. Accessible. Our frontends will be developed to ensure equal access and opportunity to everyone with a diverse set of abilities.
  7. Quality.  The quality of our experiences should be prioritized to deliver customer value, solve customer problems, and be at a level of performance that meets our SLA’s and reduces customer reported bugs. 

Defining Our Tenets

We set out to define a core set of tenets for this strategy; a core set of principles designed to guide our decision making. These tenets help us to align the vision and decisions against our end goals. I wanted these tenets to be focused on driving the solution to be something that Frontend Engineers want to adopt, not something they must. We need to deliver something that is seductive, makes engineers’ lives better, and in turn is able to directly impact our customers; as engineers are able to move quicker, and have the autonomy and ownership to make decisions.

  1. Developer Experience. Start with the developer and work backwards. Tools and frameworks must enable rapid development. Developing inside the Frontend Strategy must be easy and fast, with limited friction.
  2. Metric Driven. We make decisions through the use of metrics; measuring how our pages and components behave and their latencies to drive changes.
  3. Ownership. Teams control their own destiny from end-to-end. From the infrastructure to the software development lifecycle (SDLC), owning the full stack leads to better customer focus, team productivity, and higher quality code.
  4. No Obstacles. We remove gatekeepers from the process by providing self-service options, reusable templates, and tooling.
  5. Features Over Infrastructure. We leverage solutions that unlock frontend engineer productivity, in order to focus on customer features rather than maintaining our infrastructure. 
  6. Pace of Innovation. We build solutions to obstacles that interfere with getting features in front of customers.
  7. Every Briteling. We build tools and leverage technology that allows every Briteling to build customer facing features. 

Developing Our Vision

Now that we had the challenges, requirements and tenets outlined, we needed to define a vision for this 3 year frontend strategy. Following the tenets, we want to empower Britelings to deliver customer impactful features, and make our customers lives better. We want this vision to be something everyone in the company can get behind, and as such we don’t actually reference Frontend Engineers, instead we strive to empower ALL Britelings to deliver customer impactful experiences.

Vision

Delight creators and attendees by empowering Britelings to easily design, build, and deliver best in class user experiences. 

Next Post we will talk about the Strategy and the architecture.

Writing our Golden Path

In my last blog post I explained how we defined our 3-year technical vision for the company. One of the key pillars of this vision is shifting from a model where we used the same tool for every job (mostly a combination of Python + Django + MySQL), to the right tool(s) for each job. Given that this would be a new way of working for our organization, we wanted to have some guidelines that teams would follow to ensure that our services and applications wouldn’t have a completely different tech stack depending on the team developing them, which would harm the maintainability of our overall architecture. This is why we decided to write a Golden Path document that would guide teams on the best set of technologies for each potential scenario and recommended tools for common repeatable use cases like logging, security, etc. 

The Golden Path is a document that explains the allowed technologies available for use at Eventbrite when building software. It has been built collaboratively by the entire development organization and is in continuous evolution as teams find better solutions for the problems to be solved. We require any technology choice that is not included in this list to have explicit approval from the Architecture Review Committee (ARC), which is our engineering governance body, before implementing it.

Therefore, one principle around our Golden Path is that we are recommending the use of the “right tool for the job,” which most often means opting for industry standard technologies (enabling us to focus our limited innovation tokens on technological advancements unique to live experiences). Teams are encouraged to evaluate other alternatives that are not in this document when working on their system designs, or challenge currently deprecated ones, and propose these edits to ARC if they find them superior or better suited for their use case than the currently approved ones. This is the way we keep this as a living document that improves over time and adapts to new industry trends.

We divide technologies into the following life cycle phases:

  • Emerging. New technologies that are very likely to become recommended but are not production-ready yet.
  • Recommended. The default choice as of today.
  • Allowed. Technologies that we allow although the recommended one should be used if possible.
  • Deprecated. Discouraged for new development but could be maintained for currently-existing systems.
  • Rejected. Technologies that we don’t use or haven’t used in the past but have been rejected in previous evaluations.

Our Golden Path contains several sections such as programming languages (for microservices, data science, frontend), source package managers, web frameworks, databases and caching, among others. The guidance for how to apply the Golden Path when working on a technical design is as follows:

  • Every section in the document should have a matrix that outlines the best path forward for the use cases that we’ve faced in the past, or a description that clearly specifies this. If our use case is in that list, we should choose the best technology outlined in the matrix.
  • Even if we choose a technology that has been already evaluated in the past, we still need to come up with data for our specific scenario in key dimensions such as cost, latency, etc. to ensure that it will work for this specific scenario. 
  • If a section doesn’t have a matrix yet, or our use case is not included, we will conduct a technology evaluation and contribute to the matrix. The guidelines for this are:
    • We should consider at least two options and do a full bake off before we pick a winner. Choose based on the dimensions that are important for our scenario (features, use case fit, ease of use, cost, latency, consistency, etc).

    • We are not limited to AWS technologies. For the decisions that we make, we should evaluate both the AWS offering and any other leading non-AWS contender (e.g. DynamoDB and Cassandra), including compatibility and integration with other tools of the stack. We will not favor AWS by default and will only use it as a tie-breaker if both offerings are equivalent.


    • Technologies that are deprecated shouldn’t be re-evaluated unless there’s a strong belief that the particular scenario that is being designed will be different than the reasons why that technology was deprecated (e.g. we shouldn’t be looking into unmanaged solutions since those are deprecated). These exceptions will need to be approved by ARC.


Our Golden Path was published in early 2021, a few weeks after we finalized our 3-year tech vision, and every technical design or proposal that has emerged since then is following this new standard. We do envision that in a few years from now we should be able to remove these barriers since teams will have enough internal examples to decide the best tool for the job without the risk of significantly diverging the chosen options for similar use cases.

Here are a few examples of sections extracted from the Golden Path document:

Native Libraries and Wrappers

  • Native Libraries (recommended). We should favor using the native libraries of the tools that we use (e.g. AWS SDKs, feature flags, metrics, etc). Each team consuming those SDKs is responsible for upgrading to newer versions when needed.
  • Wrappers (deprecated). We do not want to use wrappers unless they provide clear additional benefit over native libraries (such as extended capabilities or use simplicity), and we do not believe in the argument that using native libraries is a lock-in to a specific technology, as the downside of building and consuming our own wrappers is a bigger problem. Wrappers tie us to specific underlying library versions, require migration effort as new native library versions are released, and are always a subset of the functionality that those libraries provide.

Microservice Programming Languages

  • Kotlin (recommended). This is the recommended language based on the JVM. It has several benefits over Python such as being multi-threaded, improved performance, and being strongly typed, among others. We should use this language whenever we need to build services that are scalable or performant.
  • Python (recommended). We support it given our extensive in-house knowledge and current stack. We should be careful when using it with services that are expected to have significant load since it’s single-threaded and interpreted languages are typically slower than compiled ones.
  • Node.js (emerging). We have experience with Node.js for frontend development but not microservices, although we’re evaluating it.
  • Go (emerging). We built the integration service in this language. We believe that Go has potential and we should do a feature evaluation at some point.

Service-to-service Communication

This is the communication that happens when a service calls another one directly, and can be either synchronous or asynchronous.

  • gRPC (recommended). This is the only recommended RPC protocol.
  • PySOA / Legacy SOA (deprecated). We support the services that are written in these protocols that are currently in production but don’t allow any new ones to use them.

Relational Databases

Useful when there are multiple entities in the data model that are strongly related.

  • AWS Aurora (recommended). We recommend AWS Aurora which is a managed database compatible with MySQL and PostgreSQL. However, we support only the MySQL flavor.
  • AWS RDS (rejected). We don’t allow RDS since it is less scalable than Aurora although it offers very similar functionality.
  • MySQL (deprecated). We maintain the current databases that we have on MySQL but don’t allow any new functionality to be implemented on this database.

A Story of a React Re-Rendering Bug

As front-end developers, we often find ourselves getting into perplexing bugs when the page we build involves a lot of user interactions. When we find a bug, no matter how tricky it is, it means something is wrong in the code. There is no magic, and the code itself does not lie.

This blog will take you on a short journey about how I fixed a particularly annoying bug that existed in one of our products. Continue reading “A Story of a React Re-Rendering Bug”

How to fix the ugly focus ring and not break accessibility in React

header image

Creating beautiful, aesthetic designs while maintaining accessibility has always been a challenge in the frontend. One particular barrier is the dreaded “:focus” ring. It looks like this:

focus outline on a button

After clicking any button, the default styling in the browser displays a focus outline. This ugly outline easily mars a perfectly crafted interface.

A quick Stack Overflow search reveals an easy fix: just use a bit of CSS, outline: none; on the affected element. It turns out that many websites use this trick to make their sites beautiful and avoid the focus outline. Continue reading “How to fix the ugly focus ring and not break accessibility in React”

Design System Wednesday: A Supportive Professional Community

Design systems produce a lot of value by providing an effective solution both for design and engineering. Yet, they take considerable time and work to set up and maintain. Many times, only a few people get tasked with this mammoth task and knowing where to begin is hard.

Design System Wednesday is a monthly community event where we welcome anyone working on or wanting to learn about design systems. These events provide a much-needed place to show off your system, tooling, or pose a burning question to the group. You get a group of incredible product designers, front-end engineers, and product managers. Their insightful answers and battle stories directly apply to the work you’re doing.

Keep reading to learn Design System Wednesdays. Our design system community meetings promote learning, cross-discipline partnership, and systems thinking.

Get input from other design system experts

As a design systems developer/designer, surrounding yourself with others facing the same challenge is incredibly beneficial. Most likely, you are one of a handful of designers and engineers dedicated to this vast undertaking. How daunting! Where do you begin? Have you found the most effective solution? How do you manage the balance between being too design or engineering centric? Design System Wednesday provides a space to bounce ideas off of others, ask for advice, or even crack some hilarious systems jokes!

We once had the pleasure of meeting a new design system lead whose company wanted to start a design system and they charged her with starting it. She asked her design system questions and got advice from people from over 10 companies! Questions on how to get buy-in, recommendations on tech stacks, and what design tools to use. What better way to learn than from peers working on similar things? I remember everyone’s willingness to answer her questions and help steer her in the right direction.

Grow and collaborate

I attended my very first Design System Wednesday the second day at my new job. It was exciting meeting everyone and, at the same time, a little intimidating. Still, I remember people’s welcoming and open spirit. I now look forward to attending these every month. We have a different group of people join us and different companies graciously host us every session. The open dialog, hospitality, and open day structure foster a space for growth and collaboration.

Become part of a community

As a front-end engineer, I seem to always be around other engineers. How refreshing to meet people from other roles and responsibilities! A diverse group of people from companies of all sizes and disciplines comprises the Design System Wednesday community. You can usually find product designers, front-end engineers, and product managers all sitting around the same table. I get to hear how they approach problems and how they solve them.

I even get to foster new friendships over silly easter eggs their products have that I didn’t know about. One Design System Wednesday, some Atlassian designers showed me Jira Board Jr. A Jira board for kids so they don’t miss out on the joy of building a Jira Board – their April fools joke!  I find it very refreshing to step out of my bubble and build connections with peers outside my company and discipline.

Design System Wednesday at Zendesk, Aug 2018

Design System Wednesdays is a community event for the community, by the community. I love being part of this community and helping plan these events, the same way I love helping other design system-ers come together, collaborate, and inspire each other.

We enjoy community events here at Eventbrite, what about you? What are some ways you help your community come together and inspire each other? Drop us a comment below or ping me on Twitter @mbeguiluz.

Featured Image: Design System Wednesday at Zendesk – August 8, 2018

Why Would Webpack Stop Re-compiling? (The Quest for Micro-Apps)

Eventbrite is on a quest to convert our “monolith” React application, with 30+ entry points, into individual “micro-apps” that can be developed and deployed individually. We’re documenting this process in a series of posts entitled The Quest for Micro-Apps. You can read the full Introduction to our journey as well as Part 1 – Single App Mode outlining our first steps in improving our development environment.

Here in Part 2, we’ll take a quick detour to a project that occupied our time after Single App Mode (SAM), but before we continued towards separating our apps. We were experiencing an issue where Webpack would mysteriously stop re-compiling and provide no error messaging. We narrowed it down to a memory leak in our Docker environment and discovered a bug in the implementation for cache invalidation within our React server-side rendering system. Interest piqued? Read on for the details on how we discovered and plugged the memory leak!

A little background on our frontend infrastructure

Before embarking on our quest for “micro-apps,” we first had to migrate our React apps to Webpack. Our React applications originally ran on requirejs because that’s what our Backbone / Marionette code used (and still does to this day). To limit the scope of the initial switch to React from Backbone, we ran React on the existing infrastructure. However, we quickly hit the limits of what requirejs could do with modern libraries and decided to migrate all of our React apps over to Webpack. That migration deserves a whole post in itself.

During our months-long migration in 2017 (feature development never stopped by the way), the Frontend Platform team started hearing sporadic reports about Webpack “stopping.” With no obvious reproduction steps, Webpack would stop re-compiling code changes. In the beginning, we were too focused on the Webpack migration to investigate the problem deeply. However, we did find that turning off editor autosave seemed to decrease the occurrences dramatically. Problem successfully punted.

Also the migration to Webpack allowed us to change our React server-side rendering solution (we call it react-render-server or RRS) in our development environment. With requirejs react-render-server used Babel to transpile modules on-demand with babel-register.

if (argv.transpile) {
  // When the `transpile` flag is turned on, all future modules
  // imported (using `require`) will get transpiled. This is 
  // particularly important for the React components written in JSX.
  require('babel-core/register')({
      stage: 0
  });

  reactLogger('Using Babel transpilation');
}

This code is how we were able to import React files to render components. It was a bit slow but effective. However because Node caches all of its imports, we needed to invalidate the cache each time we made changes to the React app source code. We accomplished this by using supervisor to restart the server every time a source file changed.

#!/usr/bin/env bash

./node_modules/.bin/supervisor \
  --watch /path/to/components \
  --extensions js \
  --poll-interval 5000 \
  -- ./node_modules/react-render-server/server.js \
    --port 8991 \
    --address 0.0.0.0 \
    --verbose \
    --transpile \
    --gettext-locale-path /srv/translations/core \
    --gettext-catalog-domain djangojs

This addition, unfortunately, resulted in a poor developer experience because it took several seconds for the server to restart. During that time, our Django backend was unable to reach RRS, and the development site would be unavailable.

With the switch, Webpack was already creating fully-transpiled bundles for the browser to consume, so we had it create node bundles as well. Then, react-render-server no longer needed to transpile on-demand

Around the same time, the helper react-render library we were using for server-rendering also provided a new --no-cache option which solved our source code caching problem. We no longer needed to restart RRS! It seemed like all of our problems were solved, but little did we know that it created one massive problem for us.

The Webpack stopping problem

In between the Webpack migration and the Single Application Mode (SAM) projects, more and more Britelings were having Webpack issues; their Webpack re-compiling would stop. We crossed our fingers and hoped that SAM would fix it. Our theory was that before SAM we were running 30+ entry points in Webpack. Therefore if we reduced that down to only one or two, we would reduce the “load” on Webpack dramatically.

Unfortunately, we were not able to kill two birds with one stone. SAM did accomplish its goals, including reducing memory usage, but it didn’t alleviate the Webpack stoppages. Instead of continuing to the next phase of our quest, we decided to take a detour to investigate and fix this Webpack stoppage issue once and for all. Any benefits we added in the next project would be lost due to the Webpack stoppages. Eventbrite developers are our users so we shouldn’t build new features before fixing major bugs.

The Webpack stoppage investigations

We had no idea what was causing the issue, so we tried many different approaches to discover the root problem. We were still running on Webpack 3 (v3.10.0 specifically), so why not see if Webpack 4 had some magic code to fix our problem? Unfortunately, Webpack 4 crashed and wouldn’t even compile. We chose not to investigate further in that direction because we were already dealing with one big problem. Our team will return to Webpack 4 later.

Sanity check

First, our DevTools team joined in on the investigations because they are responsible for maintaining our Docker infrastructure. We observed that when Webpack stopped re-compiling, we could still see the source file changes reflected within the Docker container. So we knew it wasn’t a Docker issue.

Reliably reproducing the problem

Next, we knew we needed a way to reproduce the Webpack stoppage quickly and more reliably. Because we observed that editor autosave was a way to cause the stoppage, we created a “rapid file saver” script. It updated dummy files by changing imported functions in random intervals between 200 to 300 milliseconds. This script would update the file before Webpack finished re-compiling just like editor autosave, and enabled us to reproduce the issue within 5 minutes. Running this script essentially became a stress test for Webpack and the rest of our system. We didn’t have a fix, but at least we could verify one when we found it!

var fs = require('fs');
var path = require('path');

const TEMP_FILE_PATH = path.resolve(__dirname, '../../src/playground/tempFile.js');

// Recommendation: Do not set lower than 200ms 
// File changes that quickly will not allow webpack to finish compiling

const REWRITE_TIMEOUT_MIN = 200; 
const REWRITE_TIMEOUT_MAX = 300;
const getRandomInRange = (min, max) => (Math.random() * (max - min) + min)
const getTimeout = () => getRandomInRange(REWRITE_TIMEOUT_MIN, REWRITE_TIMEOUT_MAX);

const FILE_VALUES = [
    {name: 'add', content:'export default (a, b) => (a + b);'},
    {name: 'subtract', content:'export default (a, b) => (a - b);'},
    {name: 'divide', content:'export default (a, b) => (a / b);'},
    {name: 'multiply', content:'export default (a, b) => (a * b);'},
];

let currentValue = 1;
const getValue = () => {
    const value = FILE_VALUES[currentValue];
    if (currentValue === FILE_VALUES.length-1) {
        currentValue = 0;
    } else {
        currentValue++;
    }
    return value;
}


const writeToFile = () => {
    const {name, content} = getValue();
    console.log(`${new Date().toISOString()} -- WRITING (${name}) --`);
    fs.writeFileSync(TEMP_FILE_PATH, content);
    setTimeout(writeToFile, getTimeout());
}

writeToFile();

With the “rapid file saver” at our disposal and a stroke of serendipity, we noticed the Docker container’s memory steadily increasing while the files were rapidly changing. We thought that we had solved the Docker memory issues with the Single Application Mode project. However, this did give us a new theory: Webpack stopped re-compiling when the Docker container ran out of memory.

Webpack code spelunking

The next question we aimed to answer was why Webpack 3 wasn’t throwing any errors when it stopped re-compiling. It was just failing silently leaving the developer to wonder why their app wasn’t updating. We began “code spelunking” into Webpack 3 to investigate further.

We found out that Webpack 3 uses chokidar through a helper library called watchpack (v1.4.0) to watch files. We added additional console.log debug statements to all of the event handlers within (transpiled) node_modules, and noticed that when chokidar stopped firing its change event handler, Webpack also stopped re-compiling. But why weren’t there any errors? It turns out that the underlying watcher didn’t pass along chokidar’s error events, so Webpack wasn’t able to log anything when chokidar stopped watching.

The latest version of Webpack 4, still uses watchpack, which still doesn’t pass along chokidar’s error events, so it’s likely that Webpack 4 would suffer from the same error silence. Sounds like an opportunity for a pull request!

For those wanting to nerd out, here is the full rabbit hole:

This whole process was an interesting discovery and a super fun exercise, but it still wasn’t the solution to the problem. What was causing the memory leak in the first place? Was Webpack even to blame or was it just a downstream consequence?

Aha!

We began looking into our react-render-server and the --no-cache implementation within  react-render, the dependency that renders the components server-side. We discovered that react-render uses decache for its --no-cache implementation to clear the require cache for every request for our app bundles (and their node module dependencies). This was successful in allowing new bundles with the same path to be required, however, decache was not enabling the garbage collection of the references to the raw text code for the bundles.

Whether or not the source code changed, each server-side rendering request resulted in more orphaned app bundle text in memory. With app bundle sizes in the megabytes, and our Docker containers already close to maxing out memory, it was very easy for the React Docker container to run out of memory completely.

We found the memory leak!

Solution

We needed a way to clear the cache, and also reliably clear out the memory. We considered trying to make decache more robust, but messing around with the require cache is hairy and unsupported.

So we returned to our original solution of running react-render-server (RRS) with supervisor, but this time being smarter with when we restart the server. We only need to take that step when the developer changes the source files and has already rendered the app. That’s when we need to clear the cache for the next render. We don’t need to keep restarting the server on source file changes if an app hasn’t been rendered because nothing has been cached. That’s what caused the poor developer experience before, as the server was unresponsive because it was always restarting.

Now, in the Docker container for RRS, when in “dynamic mode”, we only restart the server if a source file changes and the developer has a previous version of the app bundle cached (by rendering the component prior). This rule is a bit more sophisticated than what supervisor could handle on its own, so we had to roll our own logic around supervisor. Here’s some code:

// misc setup stuff
const createRequestInfoFile = () => (
    writeFileSync(
        RRS_REQUEST_INFO_PATH,
        JSON.stringify({start: new Date()}),
    )
);

const touchRestartFile = () => writeFileSync(RESTART_FILE_PATH, new Date());

const needsToRestartRRS = async () => {
    const rrsRequestInfo = await safeReadJSONFile(RRS_REQUEST_INFO_PATH);

    if (!rrsRequestInfo.lastRequest) {
        return false;
    }

    const timeDelta = Date.parse(rrsRequestInfo.lastRequest) - Date.parse(rrsRequestInfo.start);

    return Number.isNaN(timeDelta) || timeDelta > 0;
};

const watchSourceFiles = () => {
    let isReady = false;

    watch(getFoldersToWatch())
        .on('ready', () => (isReady = true))

        .on('all', async () => {
            if (isReady && await needsToRestartRRS()) {
                touchRestartFile();
                createRequestInfoFile();
            }
        });
}

const isDynamicMode = shouldServeDynamic();
const supervisorArgs = [
    '---timestamp',
    '--extensions', extname(RESTART_FILE_PATH).slice(1),

    ...(isDynamicMode ? ['--watch', RESTART_FILE_PATH] : ['--ignore', '.']),
];
const rrsArgs = [
    '--port', '8991',
    '--address', '0.0.0.0',
    '--verbose',
    '--request-info-path', RRS_REQUEST_INFO_PATH,
];

if (isDynamicMode) {
    createRequestInfoFile();
    touchRestartFile();
    watchSourceFiles();
}

spawn(
    SUPERVISOR_PATH,
    [...supervisorArgs, '--', RRS_PATH, ...rrsArgs],
    {
        // make the spawned process run as if it's in the main process
        stdio: 'inherit',
        shell: true,
    },
);

In short we:

  1. Create __request.json and initialize it with a start timestamp.
  2. Pass the _request.json file to RRS to update it with the lastRequest timestamp every time an app bundle is rendered.
  3. Use chokidar directly to watch the source files.
  4. Check to see if the lastRequest timestamp is after the start timestamp when the source files change and touch a __restart.watch file if that is the case. This means we have the app bundle cached because we’ve rendered an app bundle after the server was last restarted.
  5. Set up supervisor to only watch the __restart.watch file. That way, we restart the server only when all of our conditions are met.
  6. Recreate and reinitialize the __request.json file when the server restarts, and start the process again.

All of our server-side rendering happens through our Django backend. That’s where we’ve been receiving the timeout errors when react-render-server is unreachable by Django. So, in development only, we also added 5 retry attempts separated by 250 milliseconds if the request failed because Django couldn’t connect to the react-render-server.

The results are in

Because we had the “rapid file saver” with which to test, we were able to leverage it to verify all of the fixes. We ran the “rapid file saver” for hours, and Webpack kept humming along without a hiccup. We analyzed Docker’s memory over time as we reloaded pages and re-rendered apps and saw that the memory remained constant as expected. The memory issues were gone!

Even though we were once again restarting the server on file changes, the react-render-server connection issues were gone. There were some corner cases where the site would automatically refresh and not be able to connect, but those situations were few and far between.

Coming up next

Now that we finished our detour of a major bug we’ll return to the next milestone towards apps that can be developed and deployed independently.

The next step in our goal towards “micro-apps” is to give each application autonomy and control with its own package.json and dependencies. The benefit is that upgrading a dependency with a breaking change doesn’t require fixing all 30+ apps at once; now each app can move at its own pace.

We need to solve two main technical challenges with this new setup:

  • how to prevent each app from having to manage its infrastructure, and
  • what to do with the massive, unversioned, shared common/ folder that all apps use

We’re actively working on this project right now, so we’ll share how it turns out when we’re finished. In the meantime, we’d love to hear if you’ve had any similar challenges and how you tackled the problem. Let us know in the comments or ping me directly on Twitter at @benmvp.

Photo by Sasikan Ulevik on Unsplash

How to Make Swift Product Changes Using a Design System

Redesigning an entire site is a daunting challenge for a frontend team. Developers approach extensive visual changes with caution as they can be challenging. You might have to go through hundreds of stylesheets updating everything from hex values to custom spacing. Did you use the same name for colors on all your files? No typos? Do your colors have accessible contrasts? What a nightmare!

At Eventbrite, our design system helps our developers make those sweeping changes all while saving time and money. Keep reading to see how a design system can help your team with consistency, accessibility, and lightning-fast redesigns.

The Key to Consistency

A design system is a library of components that developers across teams can use as building blocks for their projects. A shared library allows everyone to use components, or reusable chunks of styling and code, that look and work the same way. You don’t want ten similar but different copies of the same thing, do you? Take custom file uploader components, for example. If each team builds their custom version of the component, not only does it create a confusing user experience, but it also means that developers across teams have to maintain and test all of them. No, thank you!

As part of the Frontend Platform team here at Eventbrite, my team and I maintain the Eventbrite Design System (EDS). Because we wrote EDS in React, some of our apps use EDS while legacy apps that use other JS frameworks do not. As we move more of our products move over to React, adoption of our design system is increasing. Our user experiences across all of our platforms look and feel more cohesive than ever before. Every EDS file uploader looks and behaves the same way (with minor variations).

Accessibility for All

When everyone uses the same component, you can build accessibility features in one place, and others can inherit it for free. Furthermore, you or a dedicated team can now thoroughly test each component to ensure they work for users of all abilities and needs. The result? People that navigate your site using screen readers or keystrokes can now use your product!

We love taking advantage of this benefit here at Eventbrite. We ensure the colors in our design system components have the right contrast ratios, which means that all Eventbrite pages are usable by people with colorblindness. Our color documentation page uses CromaJS to help calculate the rations for our text and color combinations. We also use WCAG AA as our contrast standard.

A sample of one of our colors on the Eventbrite Design System colors documentation page. It includes the color name, hex, RGB, and Luma values along with the WCAG score.

We also strive for our components and our pages to work well with keyboards and screen readers. EDS has a Keyboard higher-order component (HOC) where we use react-hotkeys to help us set up our React pages for optimal keyboard accessibility. Eventbrite works towards having all our components be accessible to all. Thanks to our design system, when Frontend Platform doubles down on accessibility, all teams that use EDS inherit the accessibility improvements by keeping up with our latest version.

Quick Turn-Arounds and Fast Redesign

Now, back to the redesign scenario. If you’ve defined all your colors and variables in one place, your team no longer has to hunt down definitions for each component. One developer can change a hex value (say, from #DB5A2C to #F05537), and every app that uses your design system inherits all changes right away.

In spite of all our planning and prep work, every once in a while our team needs to set a tight deadline. In our latest redesign, we made sweeping typography and color changes. While it seemed like a massive task, EDS enabled us to make many of these changes very quickly. We spent most of our time and energy making these changes to our products that don’t yet use EDS and thus require specific updates and quality assurance.  Check out the results of the transformation below!

Search Results Page Before the Rebrand

Eventbrite Search Results Page Before Redesign
Search Results Page After the Rebrand

Eventbrite Search Results Page After Redesign

Home Page Before Rebrand

Eventbrite Home Page Before Redesign

Home Page After the Rebrand

Eventbrite Home Page After Redesign

While adopting, implementing, and maintaining a new design system took serious work, the benefits have been well worth it. A design system might save your team a lot of time and work, too. However, they are not a magic bullet, and it takes time to get it right. Don’t despair if it doesn’t look as fleshed out as some of the more popular and well-staffed design systems, like Google’s Material UI or Airbnb’s Design Language System. Start saving time and money by having a shared library to increase consistency, increase the accessibility of your product, and make broad changes safe. Create a design system as unique as your product and start reaping the benefits.

What about you? Is your team using a design system? Is it a custom built one? Drop us some lines in the comments below or ping me directly on Twitter @mbeguiluz.

The Quest for React Micro-Apps: Single App Mode

Eventbrite’s React applications are a single React app with many entry points. To improve the development experience for both backend and frontend engineers, we implemented a single application mode (codenamed SAM) in our local environments. Whenever the React Docker container boots, it downloads and statically serves a set of pre-built assets for all of the React applications so that Webpack compilation never has to run.

Using a settings file, developers can indicate that they would like to run only their app in an active development mode. Having this feature was another significant milestone towards the quest for micro-apps. Backend engineers no longer have to wait for Webpack to set up to compile and recompile files that they will never change, and frontend developers only need to run Webpack for their app.

The post you are reading is the second in a series entitled The Quest for Micro-Apps detailing how our Frontend Platform team is decoupling our React apps from themselves and our Django monolith application. We are going to do it by creating Micro-Apps so that we can develop and deploy independently. If you haven’t already, check out the Introduction that provided background and overall goals for the project.

A little background

Our React apps are universal apps: they render both client-side in the browser and server-side in Node. Also, as mentioned in the introduction, we have just one single React application with an entry point for every app, which is how we get the different bundles to use for the different apps.

We use Docker for our development environment, which runs many, many containers to spin up a local version of all of eventbrite.com. One of these containers is our React container that contains all of the React apps. When the container starts, it spawns two Webpack processes that watch for source code changes. The server-side render requests consume the Node bundles that the first task writes to disk. The second process is a webpack-dev-server process, which creates in-memory bundles and reloads the page once new changes are compiled.

The growth problem

This setup worked fine when we initially created this infrastructure over a year ago, and we had less than a dozen apps; the processes ran quickly and development felt very responsive. However, a year later, the number of apps had nearly tripled, and the development environment was starting to feel sluggish, not only for the frontend developers who are living in React-land but also for the backend developers who never touch our React stack.

Our backend engineers developing APIs, working on the monolith, or merely browsing the site locally were spawning those same two Webpack watchers even though they weren’t making any JavaScript changes. Our backend devs were also waiting for the Webpack processes to perform their initial compilation at container start, which wasted a good amount of time. The container was also eating up a lot of memory watching for file changes that would never happen. Backend devs didn’t need Webpack running at all, just for the local site to work.

It was not just the backend devs who were hurting. Because all of the React apps were just a single app with many entry points, we were recompiling the entire app every time a change happened. When a dev made a change to their app, Webpack had to follow all of the other 29 entry points to see if their Node and webpack-dev-server bundles needed to be recreated as well. Why should they have to wait when they only cared about changes to their app? Webpack is smart about knowing what has changed, but it was still doing a whole lot of unnecessary work. Furthermore, at the container start, we were still waiting for the initial Webpack compilation to build all of the other apps, in addition to the one we were working on.

Static apps to the rescue

Our proposed solution was to enable a “static mode” in our development environment. By default, everyone would load the same bundled assets that are used in our continuous integration (CI) server. In this case, we wouldn’t need webpack-dev-server running; we could use a simple static Express server for serving assets. This new approach would greatly benefit our backend engineers who weren’t writing React code.

A developer would have to opt-in to run their app(s) in “dynamic mode.” However, the Webpack processes would only watch specific app(s), significantly reducing the amount of work they would need to do. This approach would greatly benefit our frontend engineers who were working on only an app or two at a time.

Single Application Mode (codenamed SAM) also fit into our long-term strategy of micro-apps. We still want developers to be able to browse the entire site in their local development environment even when all of the React applications are independently developed and deployable. Enabling this mode means that most or all of the local site has to be able to run in “static mode,” similar to a quality assurance (QA) environment. So this milestone not only allows us to break up this mega project but also increases developer productivity while we journey towards the end goal.

How we made it happen

As mentioned in the introduction, this entire endeavor is about replacing the existing infrastructure while it’s still running. Our goal is zero downtime due to bugs or rollbacks. This means that we have to move in smaller phases than if we were just building it greenfield. Phase 1 of this project introduced the concept of “static mode,” but it was disabled by default and it was all-or-nothing; you couldn’t single out specific apps. Once we tested and verified everything was working, we enabled “static mode” by default in Phase 2. After that was successful in the wild, we added “single-application mode” (SAM) in Phase 3.

Phase 0: CI setup

Before anything began, we needed to augment our current CI setup in Jenkins. To run in “static mode,” we decided to use the production assets built for our CI server in our development environment. This way, developers could easily replicate the information in our QA environment within their development environments.

When the code is merged to master, a Jenkins job builds the production assets and uploads a tarball (a package of files compressed with gzip) to the cloud with the build id in its name. Every hour, the latest tarball is downloaded and unpacked on a specific QA machine to create our CI environment.

That tarball is massive because it includes every bit of CSS and JavaScript for the entire site. It takes many minutes to download and unpack the tarball, so we couldn’t use it to seed our development environment. Instead, we created a new tarball of just our React bundles for quicker downloading and unpacking.

Phase 1: All dynamic by default

Then we began building the actual system. It relies on a git-ignored settings.json file that has a configuration for how the system should work:

{
    "apps": null,
    "buildIdOverride": "",
    "__lastSuccessfulQABuildTime": "2018-06-22T21:31:49.361Z",
    "__lastSuccessfulQABuildId": "12345-master-cfda2b6"
}

Every time the react container starts, it reads the settings.json file and the apps property that indicates static versus dynamic mode. If the settings.json file doesn’t exist, it gets auto-created with null as the value for the apps property. One or more app names within the apps array means dynamic mode, while an empty array means static mode, and null means use the default.

If the settings file indicates static mode, we retrieve the latest QA tarball stored in the cloud and unpack it locally where the Webpack compiled bundles would have been. We choose the latest build on QA instead of the HEAD of master so that what’s running locally will match what’s currently running on QA. The __lastSuccessfulQABuildTime and __lastSuccessfulQABuildId properties are logging information written out in static mode to help with later debugging.

Now, instead of running webpack-dev-server, we just run a static Express server to serve all of the static bundle assets. Because our server-side React renderer is already reading bundles written to disk by the second Webpack process, it doesn’t have to change at all because now those bundles just happen to come from the tarball.

Here’s the gist of the Docker start script:

(async () => {
    // create settings.json file w/ default settings if it doesn't exist yet
    await ensureJSONFileExists(SETTINGS_PATH, DEFAULT_SETTINGS);

    // fetch prebuilt bundles from cloud, use `--no-fetch` to bypass
    if (!process.argv.includes('--no-fetch')) {
        try {
            await spawnProcess('yarn fetch:static');
        } catch(e) {
            console.log(e.message);
            process.exit(e.statusCode);
        }
    }

    if (shouldServeDynamic()) {
        // run webpack in normal development mode
        spawnProcess('yarn dev');
    } else {
        // run static server to serve prebuilt bundles
        spawnProcess('yarn serve:static');
    }
})();

A developer can also select a specific tarball with the buildIdOverride property instead of using the most recent QA tarball. This is a rarely used feature, but comes in handy when needing to test out a release candidate (RC) build (or any other build) locally.

The key with this phase was minimal disruption. To start things off, we defaulted to dynamic mode, the existing way things worked. If any app was listed (i.e. apps was non-empty), we would run all the apps in the dynamic mode, using Webpack to compile the changes.

When this released, everything worked the same as before. Most folks didn’t even realize that the settings.json file was being created. We found some key stakeholders to explicitly enable static mode and worked out the kinks for about a week before moving on to Phase 2.

Phase 2: All static by default

After we felt confident that the static mode system worked, we wanted to make static mode the default, the huge win for the backend engineers. First we announced it in our weekly Frontend Guild meeting and asked all the frontend developers to start explicitly listing the names of their app(s) in the apps property within the settings.json file. This way when we flipped the switch from dynamic-by-default to static-by-default, their environment would continue to run in dynamic mode.

{
    "apps": ["playground"],
    "buildIdOverride": "",
    "__lastSuccessfulQABuildTime": "2018-06-22T21:31:49.361Z",
    "__lastSuccessfulQABuildId": "eventbrite-25763-master_16.04-c1d32bb"
}

It was at this point that we wished we had a feature flag or rollout system for our development infrastructure, like the feature flag system we have for the site where we can slowly roll out features to end users. It would’ve been nice to be able to turn on static-by-default to a small percentage of devs and slowly ramp up to 100%. That way we could handle bugs before they affected all developers.

Without such a system, we had to make the code change that enabled static mode as the default and just hope that we had adequately tested it! Now any developer who hadn’t specified an app name (or names) in their settings.json would get static mode the next time their React container restarted. We ran into a few edge case problems, but nothing major. After about a week or two, we resolved them all and moved on to Phase 3.

Phase 3: Single-application mode (SAM)

Single-application mode (codenamed SAM) was the actual feature we wanted. Instead of having to choose between all-dynamic or all-static, we started reading the apps property to determine which apps to run in dynamic mode while leaving the rest in static mode.

Before in all-dynamic mode, we determined the entry points by finding all of the subfolders within the src folder that had an index.js entry point. Now with single-application mode, we just read the apps property in settings.json to determine the entry points. All other apps are run in static mode.

/**
 * returns an object with appName as key and appPath as string value to be consumed by webpack entry key
 */
const getEntries = () => {
    const appNames = getSettings().apps || [];
    const appPaths = appNames.map((appName) => path.resolve(__dirname, appName, 'index.js'))
        .filter((filePath) => fs.existsSync(filePath));

    if (_.isEmpty(appPaths)) {
        throw new Error('There are no legitimate apps to compile in your entries file. Please check your settings.json file');
    }

    const entries = appPaths
        .reduce((entryHash, appPath) => {
            const appName = path.basename(path.dirname(appPath));

            return {
                ...entryHash,
                [appName]: appPath,
            };
        }, {});

    return entries;
};

Before single-application mode, we ran a simple Express server for all-static and webpack-dev-server for all-dynamic. With SAM we have a mixture of both modes. However, we cannot run both servers on a single port. So we decided to only use webpack-dev-server and add middleware that would determine whether or not the incoming request was for an app running in dynamic or static mode. If it’s a static mode request, we just stream the file from the file system; if it’s a dynamic request we route to the appropriate webpack-dev-server using http-proxy-middleware.

const appNames = getSettings().apps || [];

// Object of app names and their corresponding ports to be ran on
const portMap = appNames.reduce((portMap, appName, index) => ({
    ...portMap,
    [appName]: STARTING_PORT + index,
}), {});

// Object of proxy servers, used to route incoming traffic to the appropriate client dev server
const proxyMap = appNames.reduce((proxyMap, appName) => ({
    ...proxyMap,
    [appName]: proxyMiddleware({
        target: `${SERVER_HOST}:${portMap[appName]}`,
    }),
}), {});

// call each workspace's <code>yarn start</code> command to kick off their respective webpack processes
appNames.forEach((appName) => {
    spawnProcess(<code>yarn workspace ${appName} start ${portMap[appName]}</code>);
});

const app = express();

// Setup proxy for every appName in settings. All devMode content requests will be
// forwarded through these proxies to their corresponding webpack-dev-servers
app.use((req, res, next) => {
    const appName = path.parse(req.originalUrl).name.split('.')[0];

    if (proxyMap[appName]) {
        return proxyMap[appName](req, res, {});
    }

    next();
});

// by default serve static bundles
app.use(ASSET_PATH, express.static(BUNDLES_PATH));

// start the static server
app.listen(SERVER_PORT, SERVER_HOST);

Gotchas

Issues are likely to arise with any significant change, and the change for developers to only run their app in dynamic mode was huge. Here are a couple of issues we encountered that you can hopefully avoid.

The Common Chunk

Because all of our different apps were just entry points in one big monolith app, we were able to leverage Webpack’s CommonChunkPlugin to create a shared bundle that contains the common dependencies between all of the apps. That way when our users moved between apps, after visiting the first app, they would only have to download app-specific code. Even though this is a production optimization, we built the common chunk in our development environment with webpack-dev-server as well.

Unfortunately, the common chunk broke when multiple apps were specified. Although it’s called SAM (single-application mode), the system supports specifying multiple applications that developers would like to run in dynamic mode simultaneously. While we tested that multiple apps worked in SAM, we did the majority of our testing with just one application, which is the common use case.

We include this common chunk in the tarball that gets downloaded, unpacked, and read in static mode. However, when running two apps in dynamic mode, the local common chunk would only consist of the commonalities between the two apps, not all 30+. So using the statically built common chunk caused errors in those apps running in dynamic mode.

Our initial fix was to update the webpack-dev-server middleware to also handle requests for the common chunk. However, this swung the pendulum in the opposite direction. It fixed the common chunk problem for multiple dynamic apps, but now all of the static apps were no longer using the statically built common chunk. They were using the locally built dynamic common chunk. So now all the static apps were broken.

In the end, since the common chunk is a production optimization, we elected to get rid of it in dynamic dev mode. So now no matter how many apps a developer specifies in the apps property of the settings.json, they won’t get a common chunk. However, we still need to keep the common chunk for the static mode apps for now, since the QA environment builds the apps where the common chunk still exists.

“Which mode am I in?”

Another issue we ran into wasn’t a bug, but a consequence of introducing static mode: developers didn’t know which mode they were in. Some backend developers weren’t even aware there was a static mode to begin with; they would try to make changes to an app and wonder why their changes weren’t being reflected. The problem was exacerbated when we introduced SAM in Phase 3 because one app would update while another would not. The Frontend Platform team found ourselves troubleshooting a lot of issues that ultimately were rooted in the fact that the engineer didn’t know which mode they were in.

The solution was to add an overlay message to the base HTML template that all the apps shared. It reads the settings.json file and determines which mode the currently displaying app is in, including the app name. If the app is in static mode it mentions how long it has been since its last refresh.

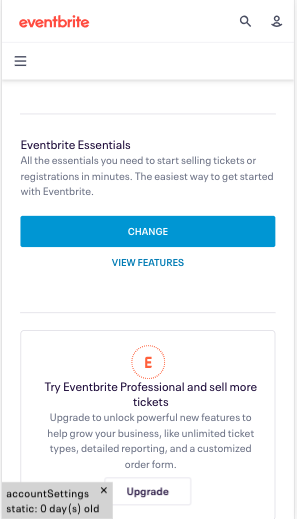
If the app is in the dynamic mode, it says “webpack dev mode.”

It turned out that mentioning the app name was also crucial because if a dev needed to work on a page that wasn’t their own, they wouldn’t always know which app needed updating.

The results are in

Our hypotheses about the benefits of the project panned out. We started hearing fewer and fewer issues from our backend engineers about the React container failing to boot. Less troubleshooting meant more time for development. Unfortunately, we don’t collect any metrics on individual engineers’ development environments so we don’t have any hard numbers on how much faster the container booted before nor the decrease in memory usage.

The biggest win for the frontend engineers was the reduction in Webpack recompile time when making changes to files. Previously Webpack traversed through all of the entry points, and now it only has to look at one (or however many the developer indicates in settings.json). The rebuild time was 2x or 3x faster, and we received lots of positive feedback.

So even though the SAM project was just a milestone in the overall endeavor to enable Micro-Apps, we were able to deliver lots of value to teams in the interim.

Coming up next

Late last year we started hearing some mysterious, but sparse reports from one or two frontend engineers that at some point Webpack would stop rebuilding when they were making changes. Over time as the engineering team added more apps and more Docker containers, the problem grew to affect almost all frontend engineers. It was even happening to us on the Frontend Platform Team.

We suspected it to be a memory issue, but we weren’t sure the source. We crossed our fingers hoping that the SAM project would fix the issue, but we were still able to trigger the problem even when only running a single app. Things were still on fire, and we realized that we couldn’t move forward with the quest for Micro-Apps until we resolved the instability issues. Any new features wouldn’t have the desired impact if the overall system was still unstable.

In the third post in the series, I will cover this topic in detail. In the meantime, have you ever managed a similar system? Did you face similar challenges? Different challenges? Let us know in the comments or ping me directly on Twitter at @benmvp.

The Quest for React Micro-Apps: The Beginning

Eventbrite’s site started as a typical mid-2000s monolith server rendered application. Although we recently moved into a React stack, we have experienced a lack of flexibility, coupling, and scale issues.

The Frontend Platform team wants to give developer teams autonomy, flexibility, and most importantly ownership of their apps so that they can move at the pace they need to provide value to our users. We have a vision: we want to get to a world where each React application can be both developed and deployed individually. In short, we want micro-apps. In this blog post series, we relate our quest for this vision, so keep on reading!

It’s been a long journey

Eventbrite built its website in the mid-2000s before the concept of a JAMstack (sites built solely on JavaScript, APIs, and Markup) was ever a thing. As a result, the site was a typical monolith application where the backend code (Python) rendered the frontend (HTML) to generate a website. In modern web architecture, we now create an entirely separate API/services layer so that there can be other data consumers, such as mobile apps or external developers.

Later on the frontend, we sprinkled in some jQuery for light client-side interactions. Once we needed more sophisticated experiences, we started using Backbone (and then Marionette). Then in early 2016, the Frontend Platform team added a React-based stack, with the hope of deprecating the legacy jQuery and Backbone apps over time.

Eventbrite isn’t one SPA (single-page application), but a collection of many applications. Sometimes an application is as big as a whole section of the site, like Event Creation/Management or Search & Browse, and other times it’s just a single admin page. In all cases, however, they are universal React apps rendered both server- and client-side.

If you’re interested in how we accomplished server-side rendering with our Django backend, take a look at a talk I gave last year on it:

Not always sunny

Although we’re moving more server-side logic into microservices accessible via the Eventbrite APIv3, our React apps are still tied to the core monolith in many unfortunate ways:

React Server-side rendering

We render server-side through our Django monolith (watch the video for more details), so the Django layer makes calls to the microservices directly to retrieve initial data. These calls are mimicked in JavaScript for subsequent client-side data retrieval.

Django HTML templates

The HTML templates used to hydrate the React apps initially are in Django-land, so all the data and environment information (locale and other context) have to come from the monolith.

Same repository

Because of the reasons above, to create a React application, you also need to create some Django scaffolding, including routing. As a result, the React apps live in the same repo as the core monolith so that developers wouldn’t have to try to keep two separate-yet-not-separate repositories in sync.

Shared package.json

Our React apps themselves aren’t truly separate. They are technically multiple entry points within a single React monolith that have a single package.json and shared bundling, transpilation, and linting configurations. If one team wants to change a dependency for their app, they need to ensure it doesn’t break the 29 others.

Cross-app dependencies

Because all of the apps come together under one single app, we can import components and utilities across applications. We’ve tried to actively discourage this, but it still happens. Instead, we’ve advised teams to put shared dependencies in the (unversioned) “common” folder.

Constant vigilance

The Frontend Platform team currently oversees the dependencies that all the apps use. We need to ensure development teams don’t accidentally back us into a corner with a library choice that prevents us from moving the platform forward in the future. We also need to make sure that those apps not actively being developed do not break with dependency changes.

Unscalable architecture

If the number of our development teams doubled, everything would probably grind to a halt. Eventbrite already has development teams in three continents across four time zones, so the status quo won’t scale.

We have a vision

We need to give teams autonomy, flexibility, and most importantly ownership of their apps so that they can move at the pace they need to provide value to our users.

We have a vision: we want to get to a world where each React application can be both developed and deployed individually; we want micro-apps. For development, devs wouldn’t need the rest of the site running. They could just build their app on their local machine talking to APIs running on our QA environment. Moreover, for deployment, the entire site wouldn’t need to be deployed to deliver new code to our users for a specific app. However, while the apps are independent, they must still feel cohesive and consistent with the rest of eventbrite.com for our end users.

Micro-apps aren’t a novel idea in the industry, but we believe that it will be immensely transformational for us.

Our quest

The thing is, the Frontend Platform team can’t just disappear for 6+ months and come back with a shiny new environment. It is too risky. It’s uncertain because the project is so massive. Moreover, it’s dangerous because it’s all or nothing. If at five months the company’s priorities change and we need to work on something more important, we would have five months of sunk cost.

So the plan is to rebuild the entire plane while it’s cruising at 36,000 feet. We’ll work on this project iteratively, breaking it down into smaller goals so that we can provide value frequently. It’d be like flying from SFO to JFK and midway through getting more legroom, free Wi-Fi, or lie-flat seats. We never want to be too far from a place where we can pause the project to work on something of greater importance. If all you got during the flight was the legroom and Wi-Fi, that would be better than having to wait for another flight to get all three.

You may have noticed that I haven’t been speaking in the past tense but in the present. That’s because we’re not done! We want to share our learnings as we go; not just the technology, but also the logistics and processes behind it. We want to share what worked, what didn’t, and what challenges we faced in hopes that you will be able to learn from what we’ve accomplished in real time.

We’re applying the same iterative approach to this series, so I’m not quite sure how many posts there will be. The team has a rough breakdown of the milestones that we want to hit and the value they provide. However, there may not be a one-to-one mapping between milestones and articles.

In any event, let’s kick things off with Part 1: Single App Mode.